Search Suggestions
Categories
Products
View All Results
Search Suggestions
Categories
Products
View All Results
Car maintenance tasks are essential for keeping your vehicle roadworthy, safe, and comfortable to drive. But whether you've just passed your test or been a driver for decades, the thought of performing many of these tasks yourself can feel daunting. And if you're wondering where to even start with routine maintenance tasks, you aren't alone. Thousands of motorists turn to Google every month, searching for answers on how best to take care of their vehicles.
To help you feel more confident when tackling car care tasks, we've looked at five different vehicle maintenance areas and found the top five most frequently asked questions in each, based on Google UK search data. With a combined total of 42,900 searches a month, it's safe to say that these are burning questions on many drivers' minds! That's why we've provided a straightforward and easy-to-understand answer for each, allowing you to take on car care with confidence. Read on to find out the answers to the UK's top car maintenance questions, plus use our handy checklist to keep on top of your car care.
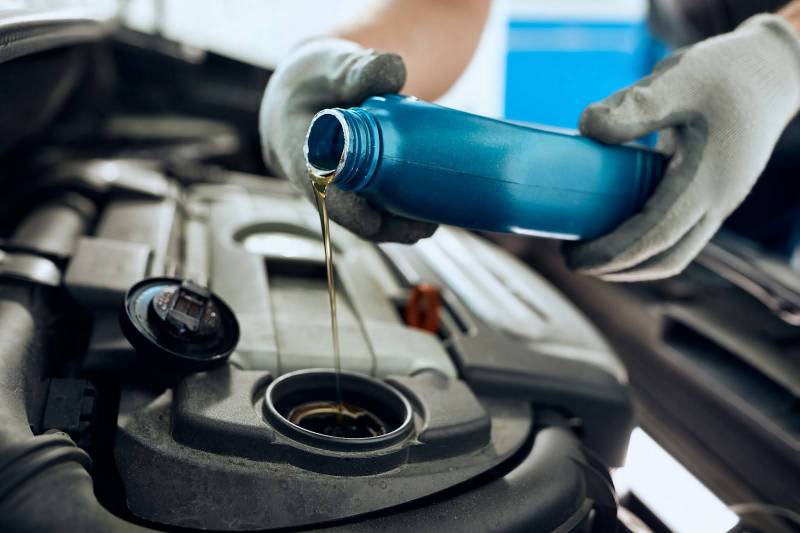
Engine oil is a vital part of car maintenance and something you can easily take care of yourself. Here are answers to the top five most frequently Googled engine oil queries.
In the vast majority of cases, you will be able to find the engine oil viscosity and the correct specification you need in your owner's manual. If you cannot find your owner's manual, or in the rare instance that your manual does not specify the type you need, you can easily find out online using just a few of your vehicle's details. With Opie Oils VRM lookup tool, simply pop in your registration number and we can find the oil you need.
If you have a heavily modified vehicle, the type of oil you need may differ to the recommendation in your handbook. If this is the case, it's best to talk with an expert before choosing your oil. Contact your garage for more information, or simply ask the Opie Oils team for an oil recommendation .
It's important to check your oil often and consistently, as low oil levels can indicate issues with your engine, such as leaks, worn cylinders, or worn piston rings. You should check your oil anything from weekly to once every few weeks, depending on your vehicle’s age, mileage, and the driving conditions. Read our guide on when and how to check your engine oil for more information.
Before you check your engine oil, you should make sure the engine is cool, so turn the car off at least 10 minutes before starting. You should also make sure you're parked on even ground with your handbrake on to get the most accurate reading. Once you've prepared, simply pull out the dipstick, dry it off, and reinsert it. When you pull it out again, check whether the oil level is closer to the minimum or maximum indicators on the dipstick. If closer to minimum, top it up. If closer to maximum, leave it as it is. If the oil is very dark, black, or milky-coloured, you may need to perform an oil change.
Topping up and changing oil is a straightforward process that can easily be done yourself. But according to a recent YouGov survey, only 17% of respondents changed their oil themselves over a 12-month period. To top up your oil at home, simply follow the steps to question three above, and if the oil needs changing use a funnel to pour the oil in, a little bit at a time until you reach the right level. Always clean up any spills afterwards, as failing to do so can lead to internal damage.
How much engine oil you need depends on the make and model of your car. Cars typically require between four to seven litres of oil, but to find out the exact right amount for your vehicle, consult your owner's manual or get in touch with us.
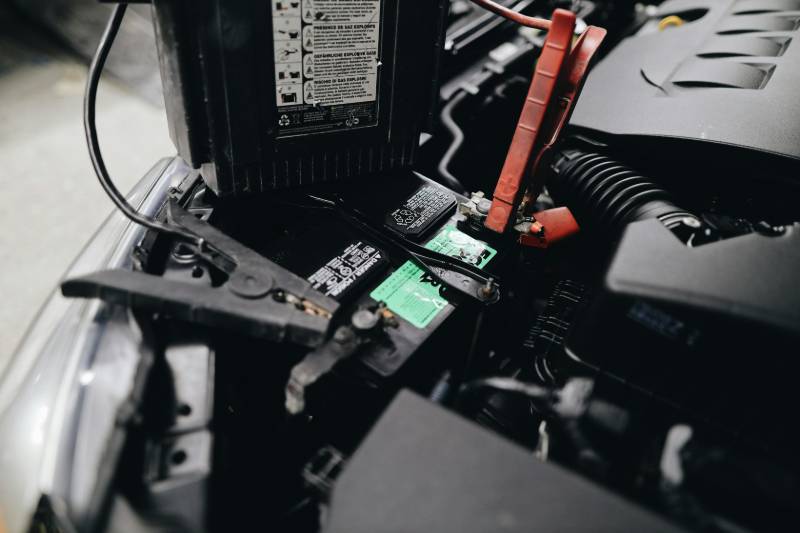
Anyone who has been a driver for a while will have experienced the inconvenience of a flat battery. The answers to these FAQs will help you prepare for the next time this event crops up, as well as reduce the chances of it happening in the first place.
If you use your car very little, you should either give it a drive or charge it once a month to keep the battery in good condition. You may also need to charge the battery if it goes flat, which can happen for a number of reasons, such as leaving your lights on or extreme temperatures.
To charge a car battery, follow these simple steps:
This depends on a number of factors, including how low the battery charge is, the charge rate you choose, and the make and model of your car. A trickle charge, which is the slowest type of charging and best for battery health, can take over 24 hours, while a fast charge can take less than four.
Many modern chargers have an indicator light or display to show charging progress. A fully charged car battery should read 12.6 – 12.8 volts when the engine is off.
The type of battery you need for your exact make and model will be in your owner's handbook. If you can't find this, there are plenty of sites online which can tell you the type you need if you provide your vehicle registration number.
The average lifespan of a petrol or diesel car battery is around three to six years, while EV batteries last between 10 and 20 years. However, bear in mind that the lifespan of a battery in part depends on how well you take care of it.
To charge your car battery, it is always best to disconnect it first. You can disconnect your car battery easily by doing the following:
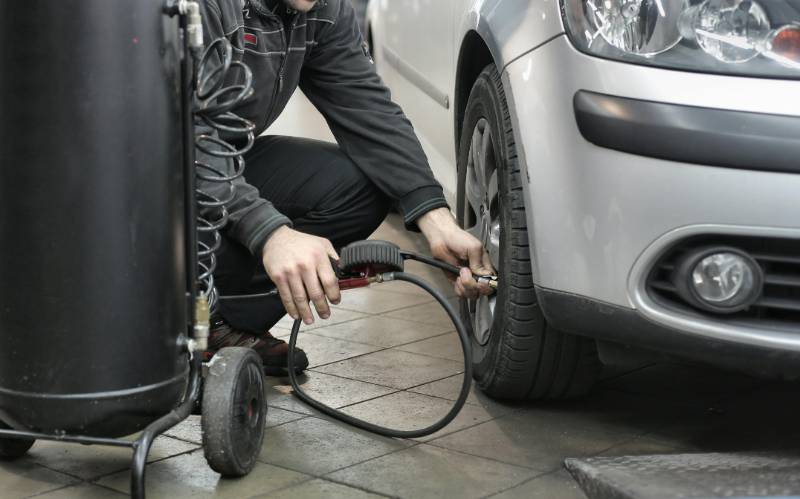
Having tyres in good condition is essential for keeping your car roadworthy. Here are the five most Googled tyre maintenance queries, to help you keep yours in top condition.
The best way to find out what tyre pressure you need for your car is by checking the owner's manual. This will list the recommended tyre pressures for different loads and driving conditions. You can also usually find the recommended pressure on a sticker located somewhere in your car. This is most often on the inside of the driver's door frame or door, but you can also find it in the glovebox or inside the fuel tank flap.
You should check your tyres with a tyre pressure gauge at least once a month, but you should do so more often in cold weather when tyre pressure can drop quickly. Aim to do a check once every two weeks in a cold spell. You should also check tyre pressures before every long journey.
The legal minimal depth of tread for car tyres (which is another FAQ, getting 1200 searches a month on Google UK) is 1.6mm. Tyre tread is something definitely worth keeping an eye on, especially if your tyres got an advisory warning in your last service.
A quick and easy way to check tyre tread depth is with the 20p method. To do this, take a 20p coin and insert it into the tread grooves of your tyre. If you can see the outer band of the coin, the tread may be below the legal limit. Some tyres also have tread wear indicator bars inside the grooves. If you can see that the tread is level with these bars, your tyre needs replacing.
Checking tyre pressure is a straightforward job that any driver should be able to do themselves. You can do it either at a petrol station with an air pump, or more conveniently, at home with your own tyre pressure gauge and inflator.If your leg is feeling strong, a foot pump is the cheapest at-home option!
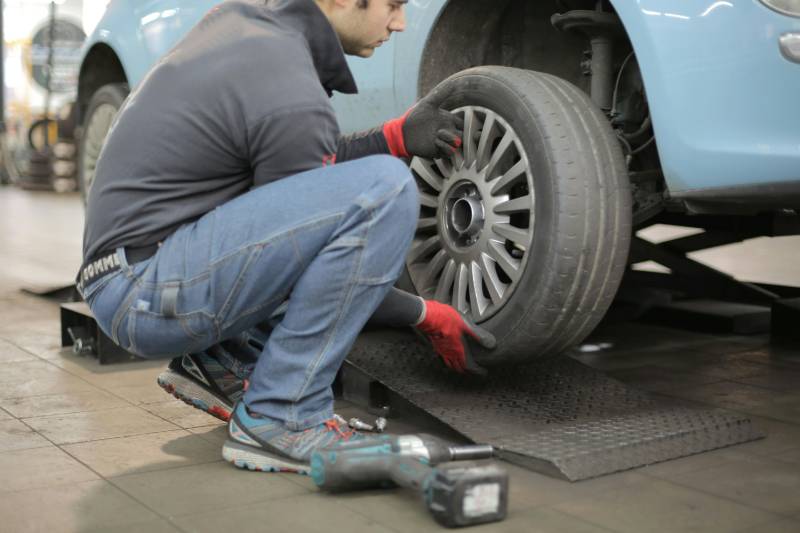
Knowing how to change a tyre is essential, not just if you get stuck with a flat on the roadside but if your tyres are coming to the end of their lifespan too. Tyres last between 20,000 and 30,000 miles on average, so once your mileage starts getting to this point you should look into changing them.
While it can seem like a daunting task, especially if you haven't done it before, it is actually a relatively straightforward job. Follow the steps below to change a tyre yourself.
Remember if you are using a space-saver spare tyre, you should only do so temporarily and only drive short distances at no more than 50mph. It is important to replace the spare with a standard tyre as soon as possible.
Poor driving habits and lack of maintenance can cause brakes to wear out prematurely. To expand their lifespan and keep them in the best condition, check out the answers to the UK's top five most frequently asked brake questions.
Squeaky brakes are one of the most common signs that there is an issue that needs addressing. Sometimes it is something as simple as dust and debris which can easily be sorted, or a thin layer of rust which can occur in cold weather and will burn off after a few drives. New brakes can squeak as they settle in too, so you may need to just give it some time if this is the case.
Other causes which require more intervention include:
To keep your brake fluid free of air (which reduces the effectiveness of the fluid), you need to bleed your brakes. You can do this by following these steps with a helper:
Although a little more complex than some other DIY jobs, you can change your own brake pads if you have the right tools and knowledge. If you don't have much mechanical experience, however, it is best to visit a professional instead.
If you are mechanically proficient and want to give it a go yourself, follow the steps below. If you've driven recently, ensure the car has cooled down before you start, and always park on a flat surface.
You can easily check how much brake fluid you have at home. Simply open the bonnet and find the brake fluid reservoir (you can find out where this is in your owner's manual or an online search). The reservoir has minimum and maximum markers on it. If the brake fluid is closer to the minimum, top it up with a brake fluid suitable for your vehicle make and model. However, keep in mind that if you need to change brake fluid it can be a messy job (and you'll need to dispose of the old fluid), so you may want to visit a mechanic instead.
Brake discs tend to last anywhere from 60,000 to 100,000 miles, depending on driving habits and the make and model of the car. And to give you a bonus answer (for a question which gets 700 searches a month on Google UK), brake pads last for around 30,000 to 70,000 miles.
Coolant is an essential but sometimes overlooked aspect of car maintenance. It's easy to top up yourself and is vital for the health of your engine. Read on to find the answers to the five most frequently searched coolant questions.
You'll find the most suitable type of coolant for your car in your owner's manual. If you've lost your manual, you should be able to find a digital copy online from the manufacturer or order a physical one. The team at Opie Oils can provide the right recommendation for pretty much any vehicle — get in touch now for our free expert advice.
Engine coolant is a water-based liquid for vehicles, designed to keep the engine running at the ideal temperature. It ensures that the engine doesn't freeze in the winter months or overheat in the summer, and it can also prevent corrosion and scale build-up in the engine.
In most cases, when the engine contains the correct coolant, at the correct ratio, adding water is going to make it less effective, so you should avoid doing so when possible. However, there are times when you may need to add a little water in an emergency. If you do this, remember that you have diluted the coolant, and therefore, it is less effective than it should be for dealing with cold and corrosion. Also, make sure to use deionised water to prevent the build up of deposits in your engine caused by tap water.
Technically, a coolant is not the same as an antifreeze. This is because a coolant just has to deal with cooling the engine and not corroding the internals. An antifreeze will do this, as well as not freeze at low temperatures. But in reality, most cans of antifreeze or coolant on the market will cool, prevent corrosion, and prevent freezing.
Generally, no, you shouldn't use water instead of coolant in your car. Water doesn't provide the same protection as coolant, plus it can make your engine more likely to freeze in cold weather. It also lacks the anti-corrosion properties needed to protect your engine. However, for some applications (mainly track use, but also for use in environmentally sensitive areas), coolants are not allowed, only de-ionised water, with a corrosion inhibitor.
Want an easy way to see all your essential car care tasks in one place? We've put together a handy car maintenance checklist so you know what you need to do, and when, to keep your vehicle in top shape. We've also highlighted which jobs are best done by a mechanic, and which ones you can do at home yourself to save some cash.
For mobile devices and small screens, this version of the above might work better.
With answers to some of the UK's most burning car maintenance questions and a thorough car care checklist, you should feel confident in performing your next vehicle checks.
Looking for the right tools to keep your car or van in top condition? Don't forget to explore our collection of motoring essentials. From essential oils and fluids to car parts , accessories , and travel and touring equipment , we've got everything you need to keep your vehicle running smoothly.
You'll find other articles and technical insights here.
Methodology
We identified five key car maintenance areas and used relevant keywords to determine the five most commonly searched questions for each topic, excluding different wordings of the same question, based on Ahrefs data. You can find our full data set here .